
With a tree connected between the Ancestry and your Family Tree Maker, you always have to do a sync between the two trees whenever you make updates to either one of the trees to transfer the changes to the other. There are two syncing modes, Auto and Manual. Manual or automatic sync may be configured during the creation of the first tree sync operation or by clicking on the sync indicator in the upper-right corner of the program and accessing Sync Options.
This article discusses the following:
- Initiating an Automatic Sync
- Initiating a Manual Sync
- Reviewing the differences reported in the Sync Change Log
- Accepting or Cancelling a Sync
Initiating an Automatic Sync
You would have your tree configured to automatically sync so that at the open or close of the program, your program would check on the differences between your Ancestry tree and your Family Tree Maker tree. In case of termination of any differences, you will be subject to being sent automatically into a sync process.
Initiating a Manual Sync
Since you have a tree configured to be manually synchronized you can synchronize any time you wish, provided that you are using the Family Tree Maker program. Manually, the synchronization can take two options.
Manual Sync from Plan Screen
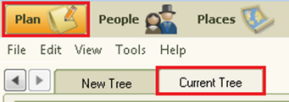
- Bring up your linked tree, in the upper left-hand corner of your program, choose Plan.
- Choose where you are not already, Current Tree, the Current Tree tab. In the case of Family Tree Maker for Mack, you need a tree that you would like to synchronize. This is accomplished by clicking the File menu and then choosing Open. Then choose a proper tree with your computer.
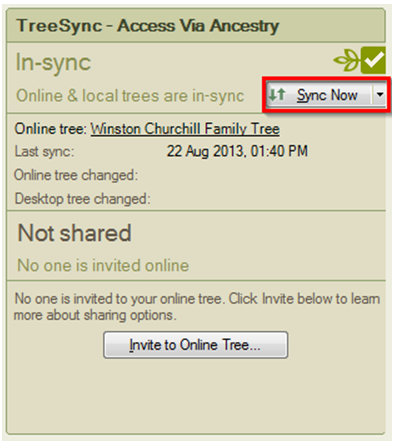
- There should be the Tree Sync – Access Via Ancestry box in the middle of the screen which is to be clicked on the Sync Now button.
Manual Sync from Sync Status Icon
In Family Tree Maker, just go to the afternoon Sync tower on the top left corner and in the drop-down menu, select Sync Now.\
Reviewing the differences reported in the Sync Change Log
Under your sync update options, you will have the change log preview set as one of the options before finalising sync, and when syncing, you will see a change summary screen appear where you can view the changes detected by the sync process before finalisation. Then, you will be able to review what changes have been detected by a particular sync before syncing. To view the Sync Change Log in a less strained way, we suggest clicking on the blue Stop Timer link (in the bottom right part of the Log window) and looking at it.
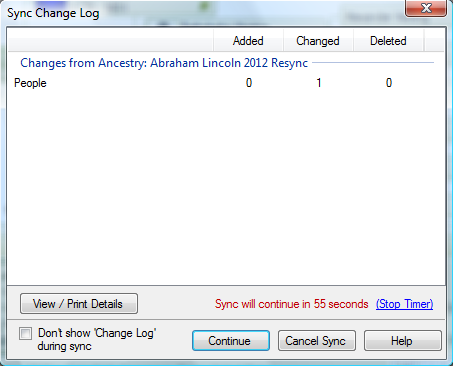
Final changes: The Sync Change Log screen will briefly summarize the changes detected by your sync. To see further details, click on the View/Print Details button left of this box.
This will raise a display screen showing the change between Ancestry and the changes between Family Tree Maker and the change items. In the list you will see:
1. Whose name the change has happened on and what data is at variance
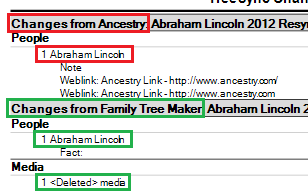
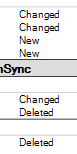
2. It will specify the New, Changed or Deleted
It will also include the username of the individual who is making the changes. This can also be applied in applications where the contributors or the editors of your online tree are invited, and it will enable you to know who was behind a particular change in your online tre,e relevant data to enable you to know who to reach should you have certain questions which arose as a result of the change which took place.

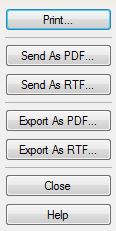
To the right, you will see several button options:
- Print – This will come up with a report of the changes that may be sent to your printer.
- Send as PDF – It will create one PDF file with your log and open the default Mail application on your computer, and put the file automatically in a new mail.
- Send as RTF – This will put it in a Rich Text file to your log, and the default email program on your computer will open as an attachment in a fresh email.
- Export to PDF – This will produce a PDF file of your logs and enable you to save it in your computer.
- Export to RTF – It will generate a Rich Text file of your log and give you the opportunity to save the same to your computer.
- Close – Clicking on this will close the Sync Log screen bringing you back to the Sync Change screen to proceed.
Accepting or Cancelling a Sync
Unless you are dissatisfied with the changes that appear in your sync log, you can click on Continue to complete the sync.
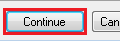
Should you not be willing to accept the changes, or want to check the changes prior to doing the sync you can use the Cancel Sync button to override your sync.
When you start a sync, you may prefer not to see the sync change log display sent in the future by clicking the Don’t show Change Log during sync check-box option in the lower left of the sync box.


My sync button will not work how can I fix it??